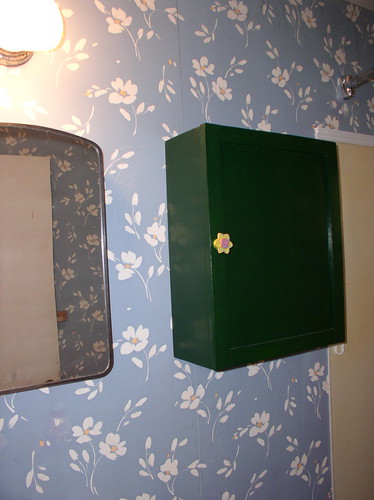
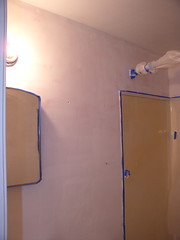
 This is what our bathroom looked like on Thursday. We've done some work on it recently - replacing the floor and toilet in April, and fixing the wall of the tub in August or maybe it was Labor Day weekend (I honestly can't remember exactly when).
I didn't blog about the the wall at the time. The tub surround is made up of 5 plastic panels. The 3 on the long side of the tub have been loose for years and we knew that the wall behind them was in rough shape. It's never a good sign when there is the sound of debris falling any time the wall is bumped. So, I pulled down the molding holding the panels, the window frame and the panels except the one on the faucet end. The intent was to reuse as much as possible. This effort was thwarted when it came to the window frame. Whoever installed it glued it to the framing. The only way to get it off was to pry off as much as possible and then chisel off the remainder.
The glued on frame wasn't the biggest surprise I got, though. Once the panels were down I cleaned up the deteriorated wall board and began taking down the remaining wall board underneath the window. This part of the wall had been patched before. The last patch was done with two layers of wall board (1/2 inch I think) which did not quite equal the depth of the original wall. To bring the wall out to the correct dimension they shimmed it with cardboard. That's right inside the tub wall there were cardboard shims. Pieces of boxes.
With that cleared out I shored up a couple of the studs, no major damage but it made me feel better, and patched the wall with cement board. Two tubes of construction adhesive later the panels were back in place. I reused the molding at the top of the panels, added quarter round plastic molding to the tub edge and reframed the window using plastic trim. I did NOT glue the window trim in place. A fair amount of chaulk later the bathroom was ready for use.
One of the casualties of the tub wall replacement was a portion of the wallpaper above the window. Underneath was a lovely pink color. We are not pink loving people. We also have never been fond of the wallpaper. Which brings me back to this weekend.
Amy headed off to Arkansas on Thursday morning and unbeknownst to her I headed to Home Depot. Actually I didn't make it to the big orange store until Thursday evening, after kayaking and playing with some new software. But I digress. At the store I picked up ceiling paint, primer, wall paint, a new towel bar, wallpaper stripping tools and a roll of painters tape.
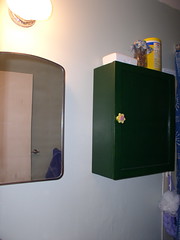
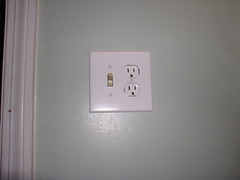
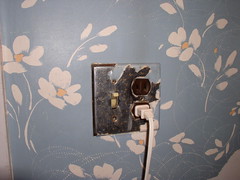 Back home again I emptied the bathroom, took down the shower curtain, took the green cabinet in the picture above off the wall, removed the tp holder and the outlet cover. The picture is of the outlet cover with most of the wall paper removed.
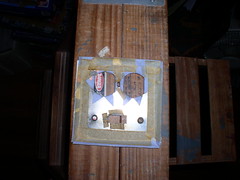 I'm entertained that the wallpaper was attached to the outlet cover with masking tape. Incidentally as is to be expected of 20 year old (or so) wallpaper it had faded considerably. The paper under the edges of the outlet cover was more purple than blue.
With the room cleared it was time to cover up the pieces I didn't remove. Most of a roll of painters tape and a goodly amount of plastic tarp later the room was ready for the fun to begin.
 Then it was time to strip. Not me the wallpaper :-). The good news is that most of it came off in large swathes. The remainder yielded pretty quickly to the wallpaper remover and a thin putty knife. Unfortunately some of the wall also gave way. One "interesting" discovery was the pink plastic tile under the sink. It's still there and will be until the sink comes off the wall. It goes so nicely with the pink paint that was on the upper part of the wall.
With the wallpaper removed it was time to clean the walls. I must have looked ridiculous mopping the walls with a sponge mop, but it did the job and the scouring pad on the edge of the sponge was particularly helpful in removing mildew. Plus I was able to do the work with my feet on the floor rather than having to maneuver on the ladder.
 Before I started painting I patched the places in the wall where the plaster had come away with the wall paper. Luckily there weren't very many of them and most were smaller than a dime. Unfortunately there were two 7X7 spots just above the toilet that needed patching. The patch job on those is satisfactory at best. If you look at the bottom of the photo in a larger view you can see the patched areas.
Finally it was time for paint. The ceiling got two coats of a white mildew resistant paint. First step on the walls was primer. The pink on the walls showed through the primer pretty strongly. This picture also gives a pretty good look at the taping/tarping job. (The yellowish panel at the right is part of the tub surround.)
Finally it was time for the top coat on the walls. I'd picked out a very subtle green. When I started putting it on the walls it looked a bit too subtle. I decided to go ahead with a coat anyway since it was at least banishing the pink. The color was so subtle it was hard to tell where the ceiling white ended and the wall color began. So, it was off to the big orange store again (trip number 3 I think). The color I got on this trip was significantly darker than the first.
Getting the darker paint onto the walls went fairly smoothly. As it dried I realized it hadn't covered as completely as I would have liked so I ended up doing a fair amount of touch-up. I finished the touch-up yesterday morning. The hardest part of the touch up was getting paint between the sink and the wall. There is only about an inch of space there. I ended up wrapping the sink in plastic wrap (a challenge in and of itself) so that I had as much space as possible to work in.
Once the paint dried it was time to put the room back together, and remove the tape. Most of the tape came off cleanly. In a couple of spots I had to use a razor blade knife to get the tape off. Putting the tp holder back up proved to be fairly difficult, although this may have been because it was late and I was so tired I couldn't see straight. The cabinet also proved to be troublesome. I did get it back up, but any other cabinets I install will be installed with cleats. (See the end of this post for an explanation.)
I had acquired a new towel bar and hook for the bathmat, so the next step was mounting these. When I opened the towel bar package I discovered that one of the mounting plates was missing. This required another visit to the big orange store. I was not happy about this. At that point (mid-day Monday) I was trying to get the room back together, cleaned, all the tools and supplies put away and a couple of other cleanup items (dishes, recycling) before Amy returned home at 7ish. The good news is that I was able to get the missing bracket without any hassle. Back home I got the brackets mounted for the towel bar and the hook without incident. It took about 3 times longer than I had expected to tighten the items to the mounting plates. They attach with a tiny set screw that is tightened with an allen wrench (hex shaped) and I couldn't get a good angle to be able to both see what I was doing and actually do it.
A final scrubbing of the room finished up the work (and I even had time to give my kayak a wash). Almost forgot - while I was at it I replaced the black sockets with a white one, and the rusty metal face plate as well. Here are the results.
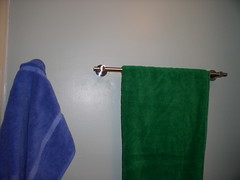
We do need to do a little more touch up, but all and all I'm very pleased. The only problem is that without the distraction of the flowers the wall above the towel bar looks very stark. We may have to acquire some artwork for it.
***********************
Cleat explanation: The cleat to hang a cabinet is created by cutting a piece of wood at an angle on the long edge. The bottom half is attached to the wall and the top half is attached to the cabinet. Mounting the cabinet just requires slipping the top portion of the cleat onto the bottom portion.
1 comment:
Post a Comment